
 - Client-Side Booking for Parties and Tickets")
Family-Friendly Restaurant User Guide (Operational Items) - Client-Side Booking for Parties and Tickets
VENUE Booking & F&B Usage Guide
Online Party Booking
-
How to Order Online?
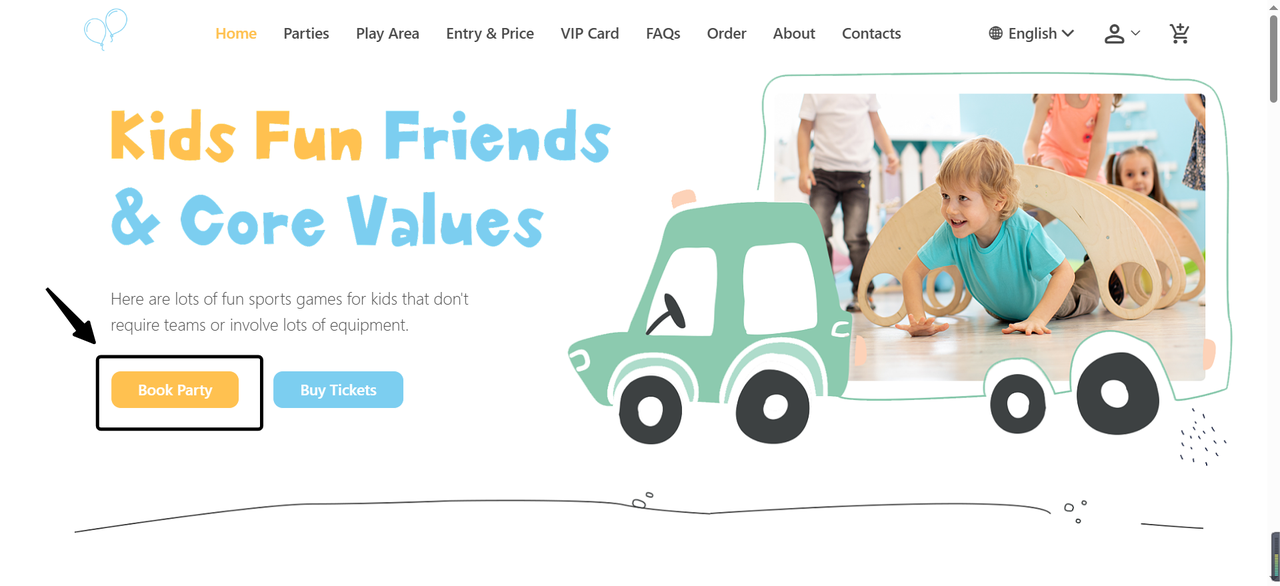
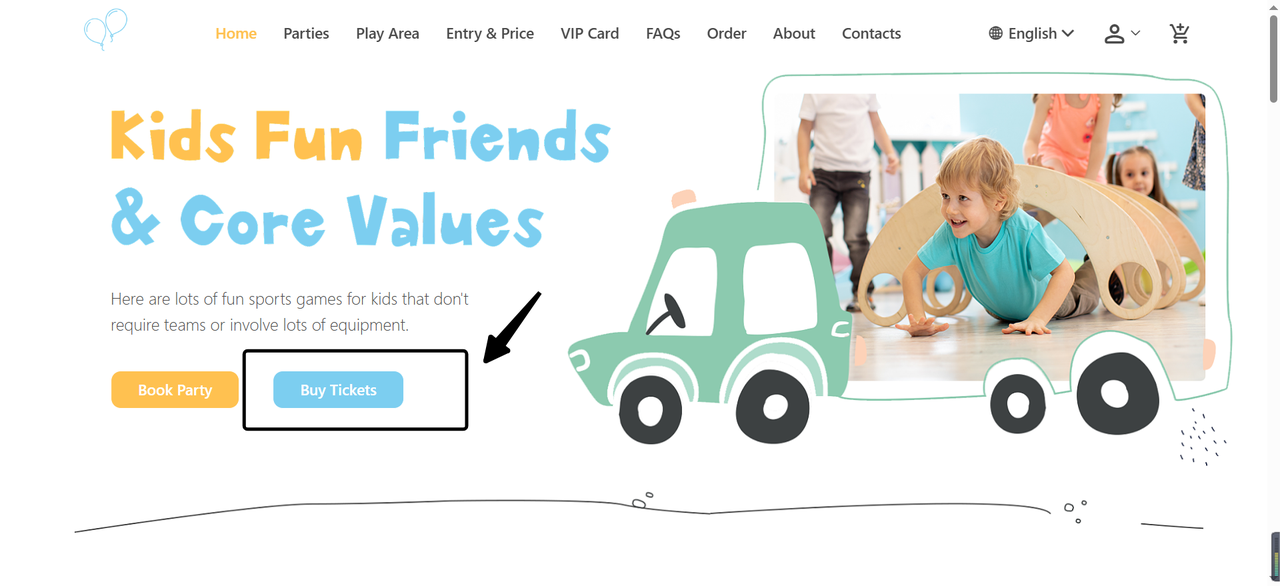
- Visit the official website
Open the corresponding merchant's official website on a PC or mobile phone.
- Navigate to the Party Reservation Interface
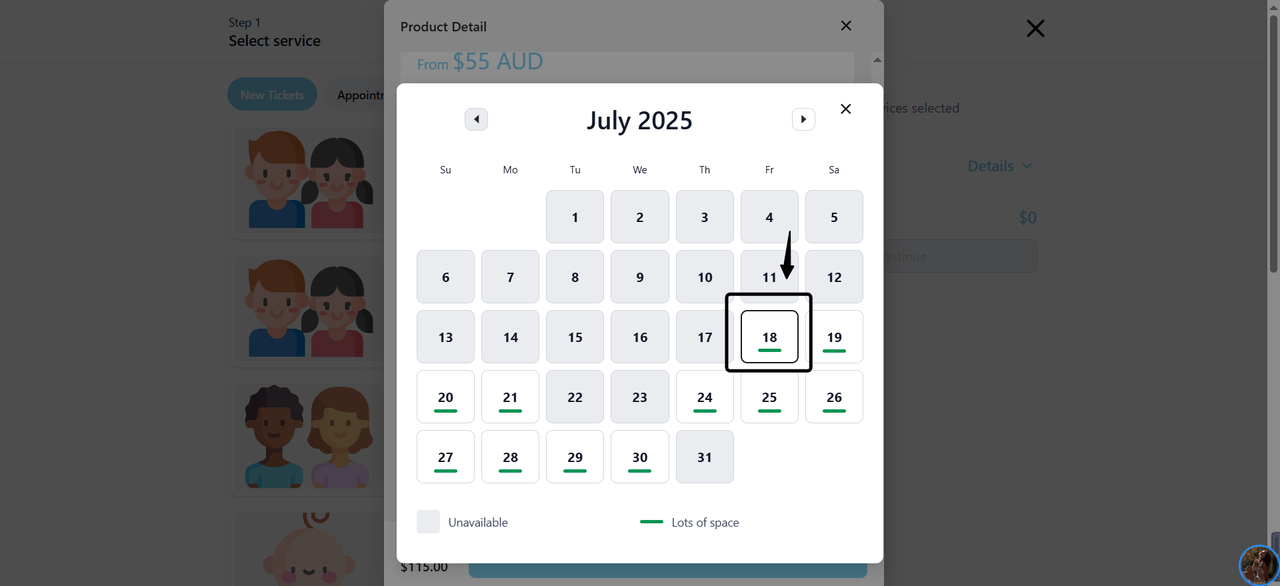
On the reservation interface, select the desired Party date.

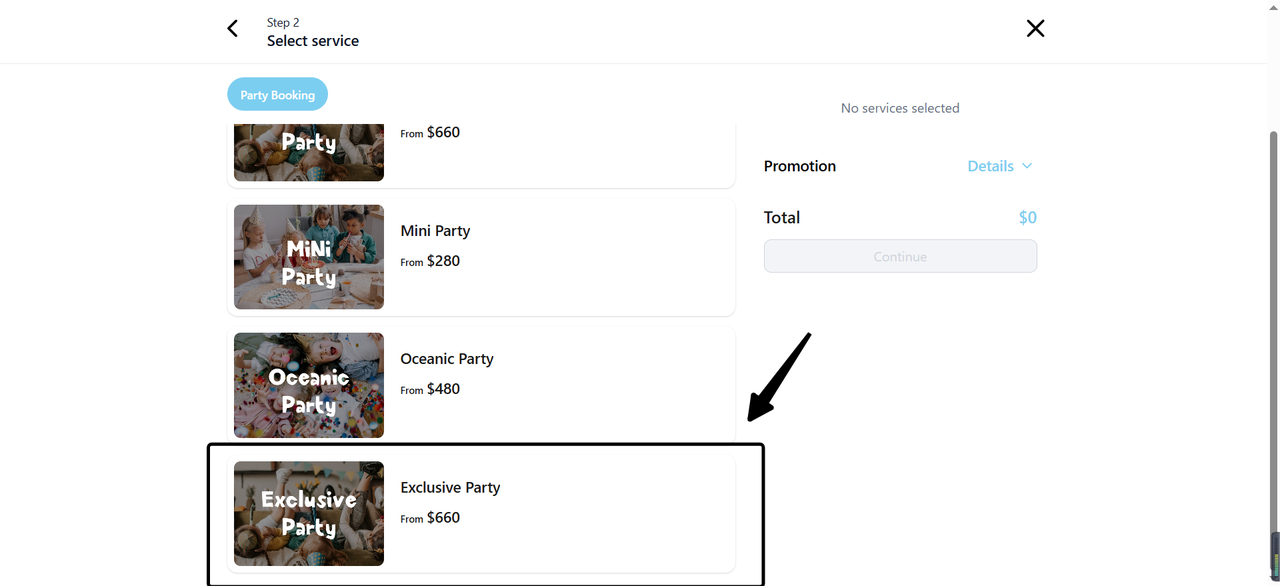
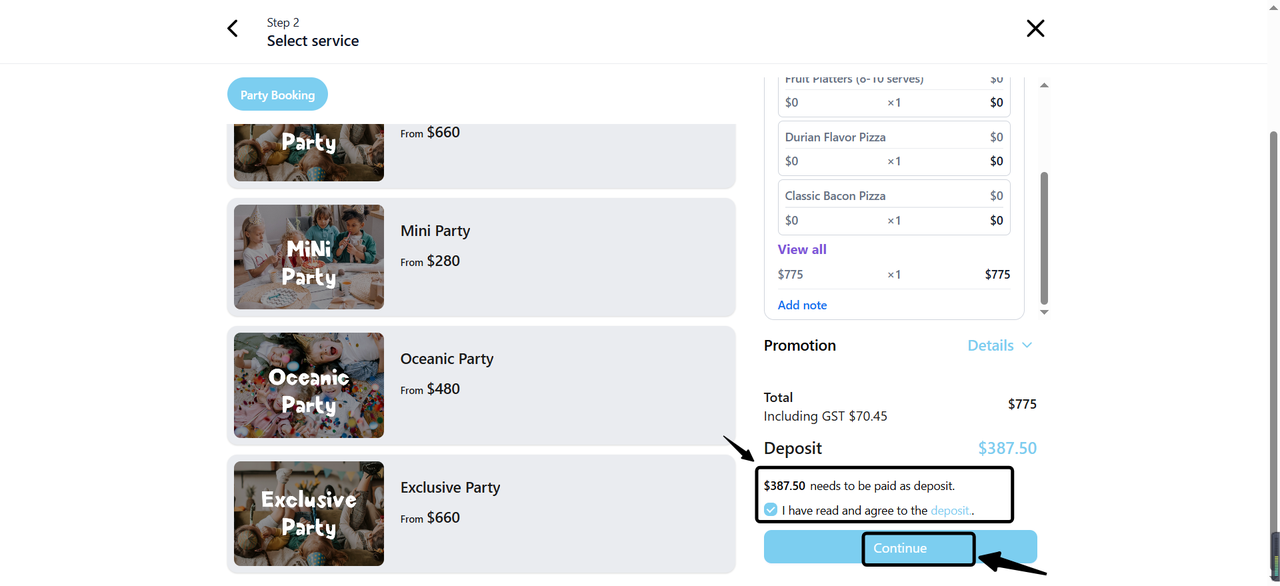
- Select Party Type
Customers browse the available different Party types according to their needs and preferences, and click on the options that interest them.
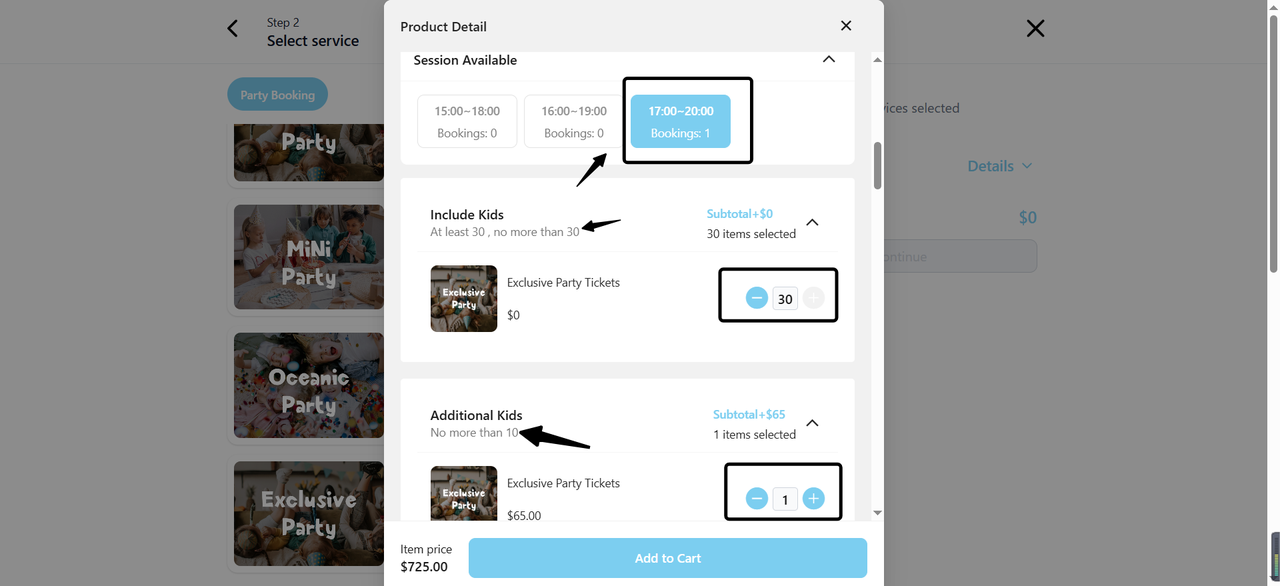
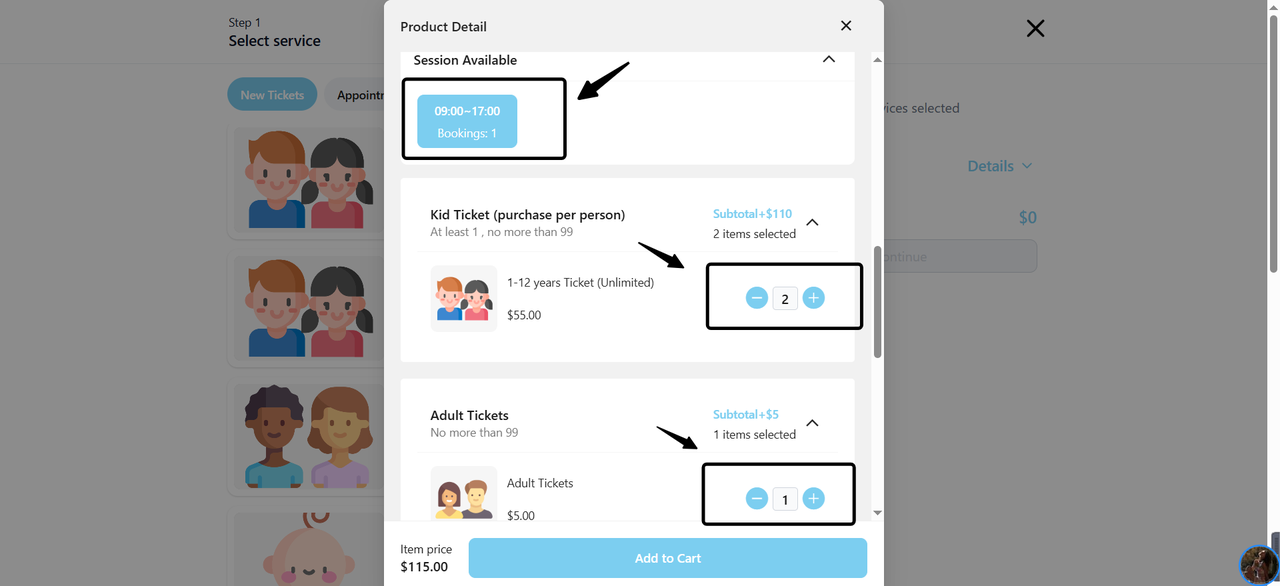
- Select Package Content
On the selected Party's details page, select the desired booking time slot, the number of tickets included in the package, and the meal options.
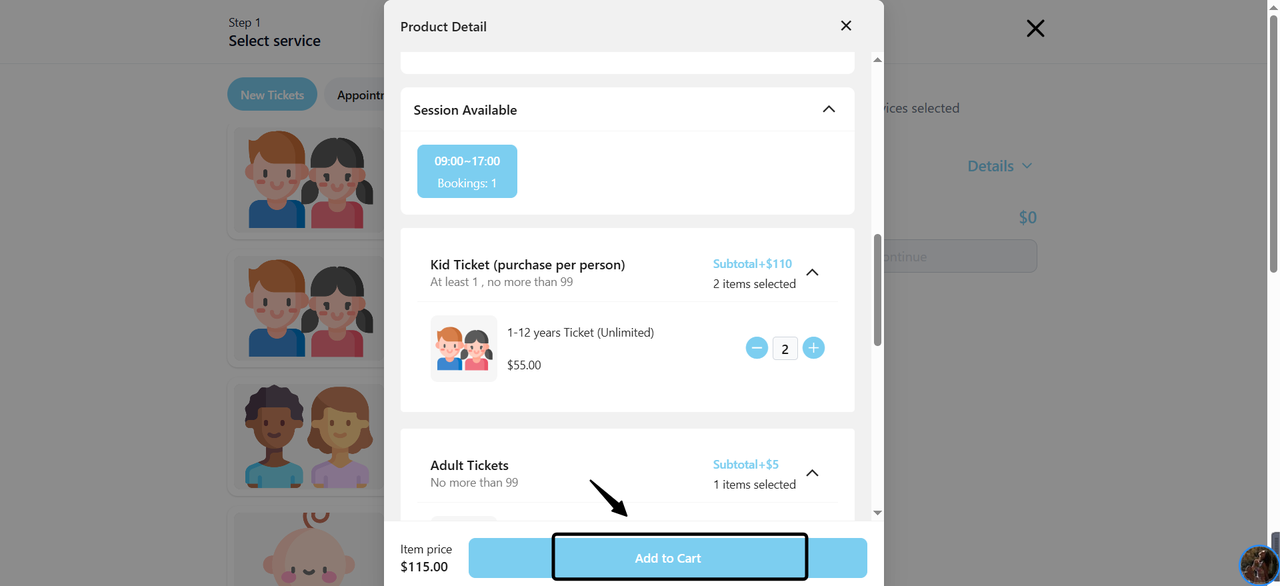
- Confirm Selection
After confirming that all selections are correct, click the "Add to Cart" button.
2. How to Pay the Deposit?
-
Add to Cart
After selecting the number of tickets and meals included in the package, add the items to the cart.
-
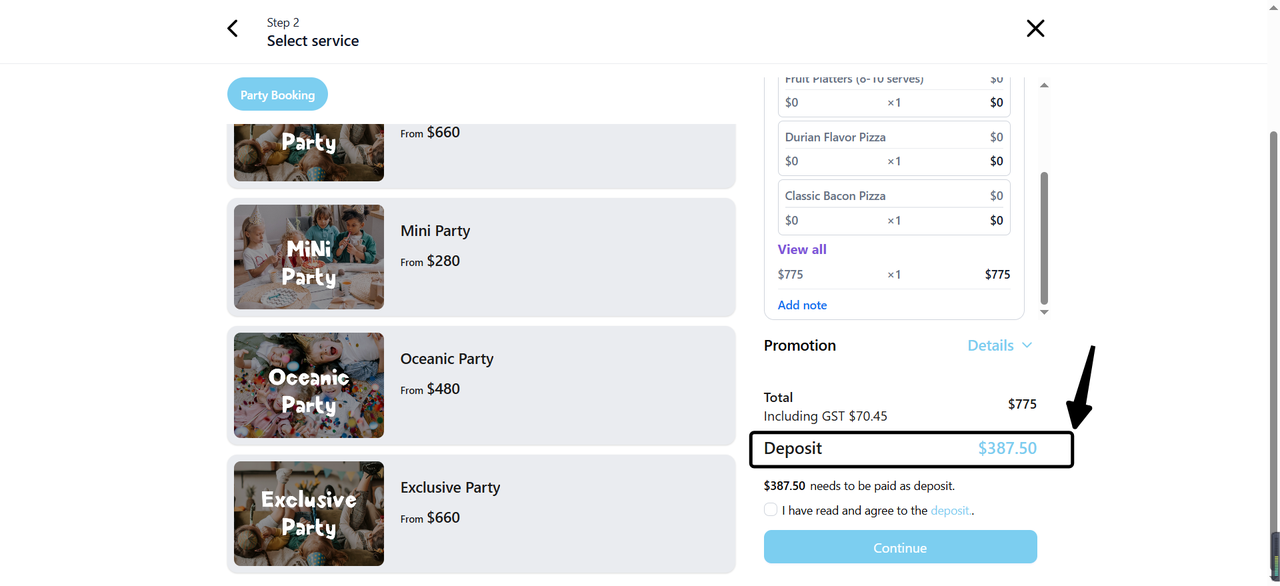
View the Deposit Agreement and Deposit
- On the right side of the list, the corresponding deposit specifications will pop up. Please carefully review the relevant information.
- Review and check the corresponding deposit agreement, then select 'Continue'.
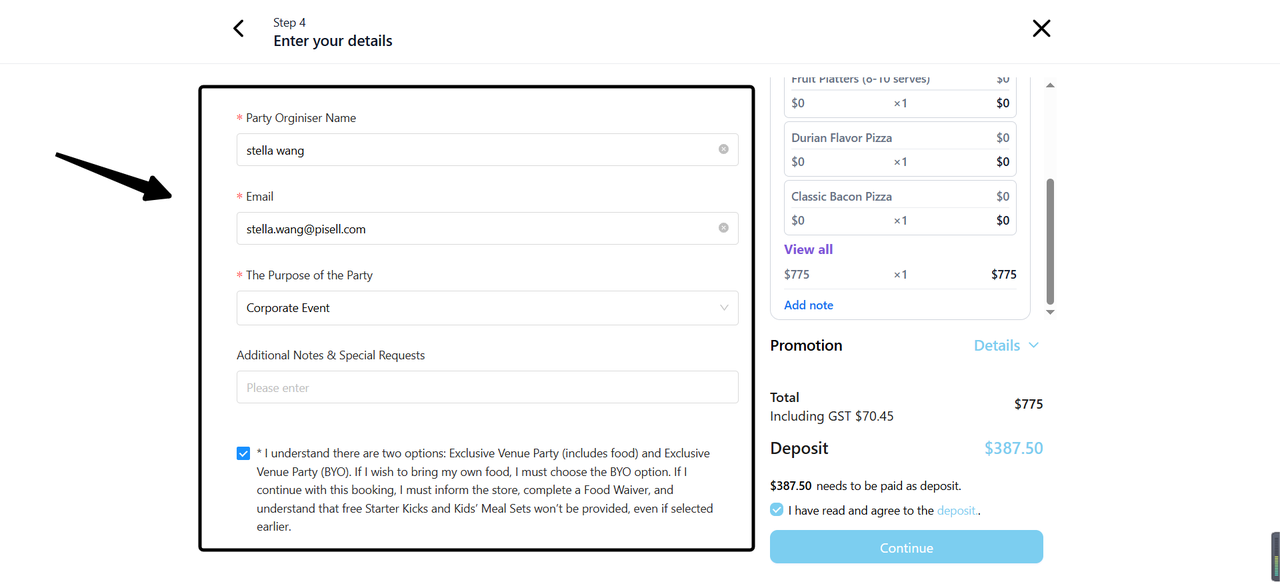
- Fill in Customer Information
Based on the merchant's actual needs, fill in the relevant customer information, including name, contact information, etc., and select "Continue" after completion.
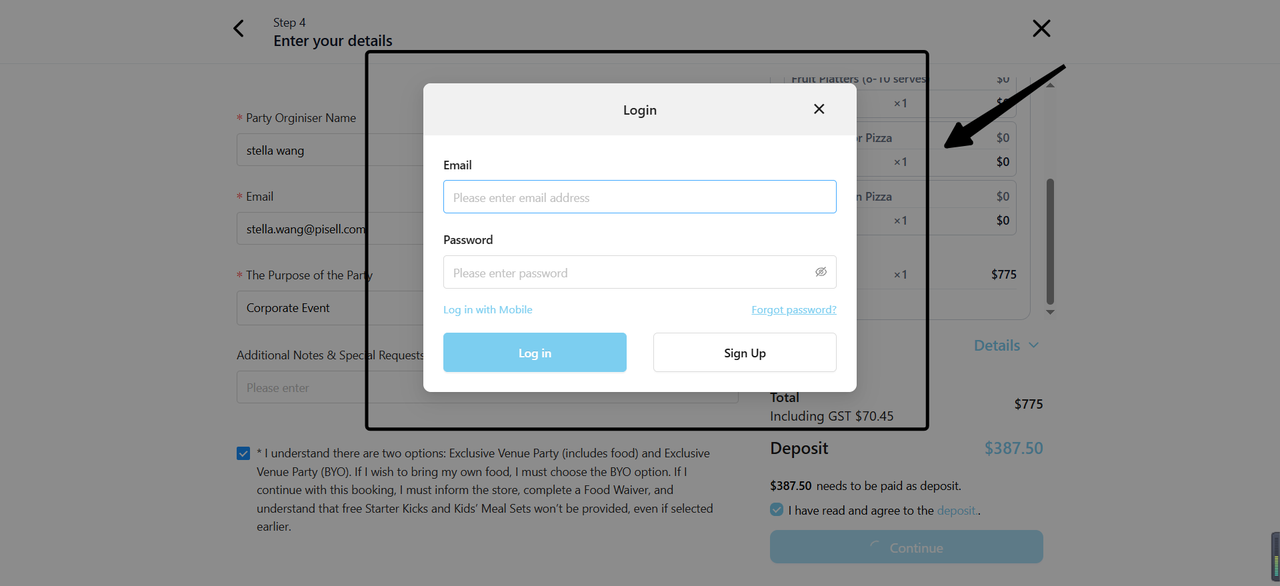
- Log In or Register an Account
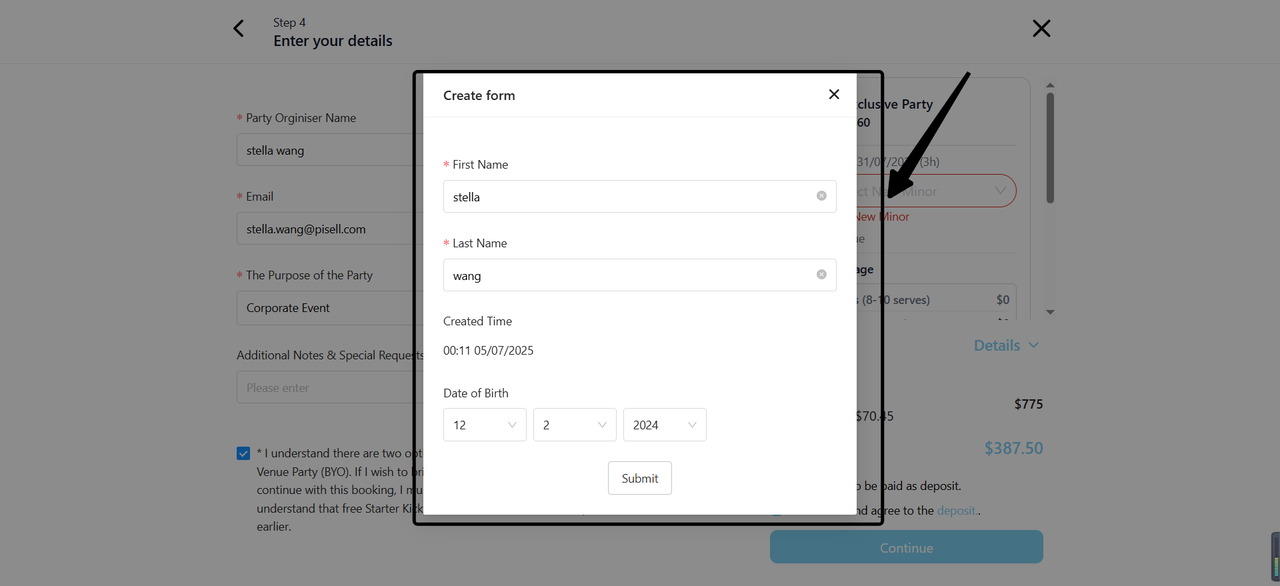
- Fill in Minor Information (if applicable)
If the merchant's Party requires binding a minor, please fill in the relevant information and submit it.
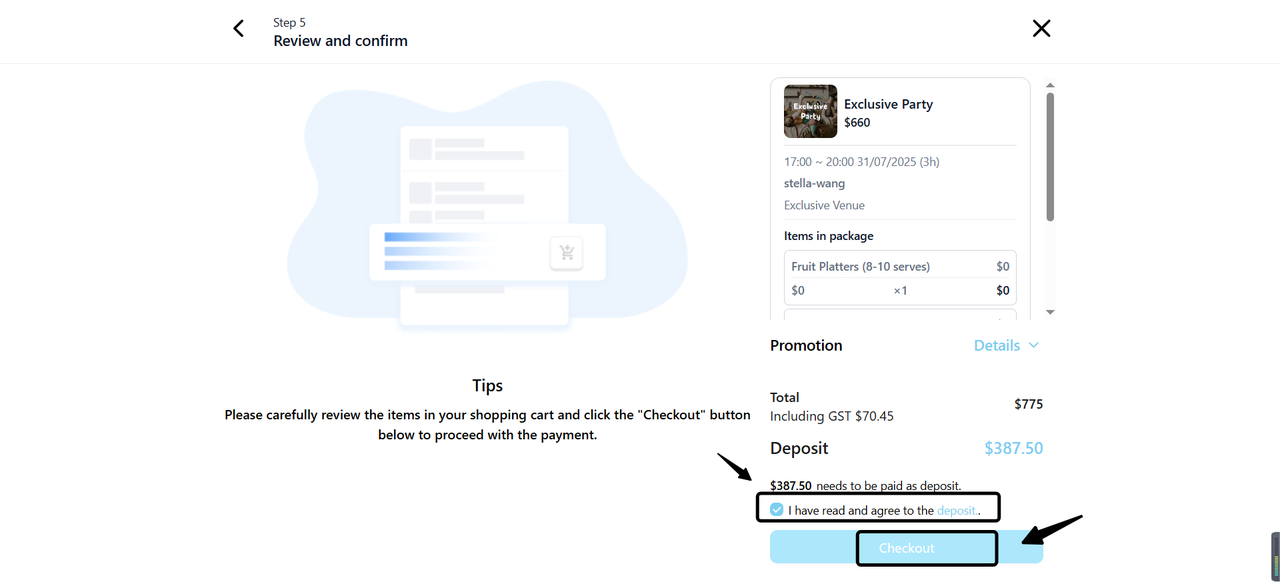
- Read and Agree to the Party Agreement
Before continuing, read and agree to the Party agreement.

- Click "Checkout"
After confirming that all information is correct, click "Checkout".
- Select Payment Method
Based on the payment methods available from the merchant, select a suitable payment method to pay the deposit.

3. How to Pay the Balance?
-
Trigger the Balance Payment Link (Manual Sending / Automatic Trigger)
- Automatic Trigger: If the merchant enables the automatic trigger for the balance payment link, the system will automatically send the balance payment link to the customer's registered email address according to the date set by the merchant before the Party starts.
- Manual Sending: Before the Party starts, the merchant can also manually send the balance payment link to the customer's registered email address based on the actual situation.
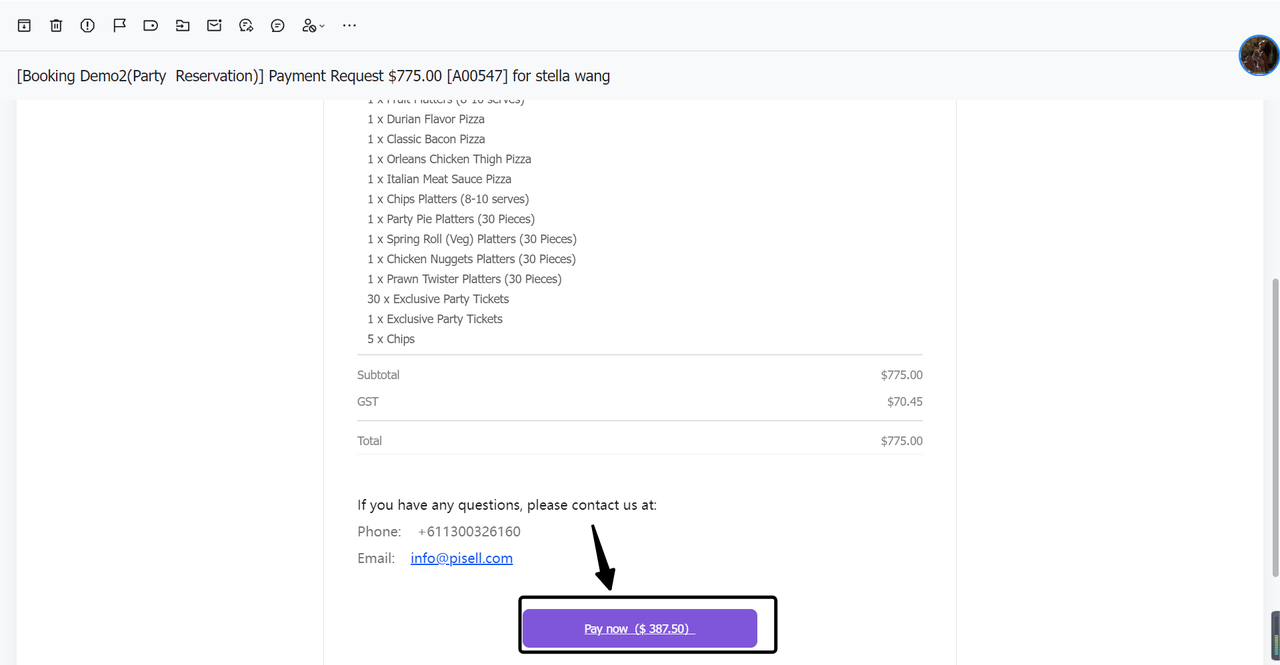
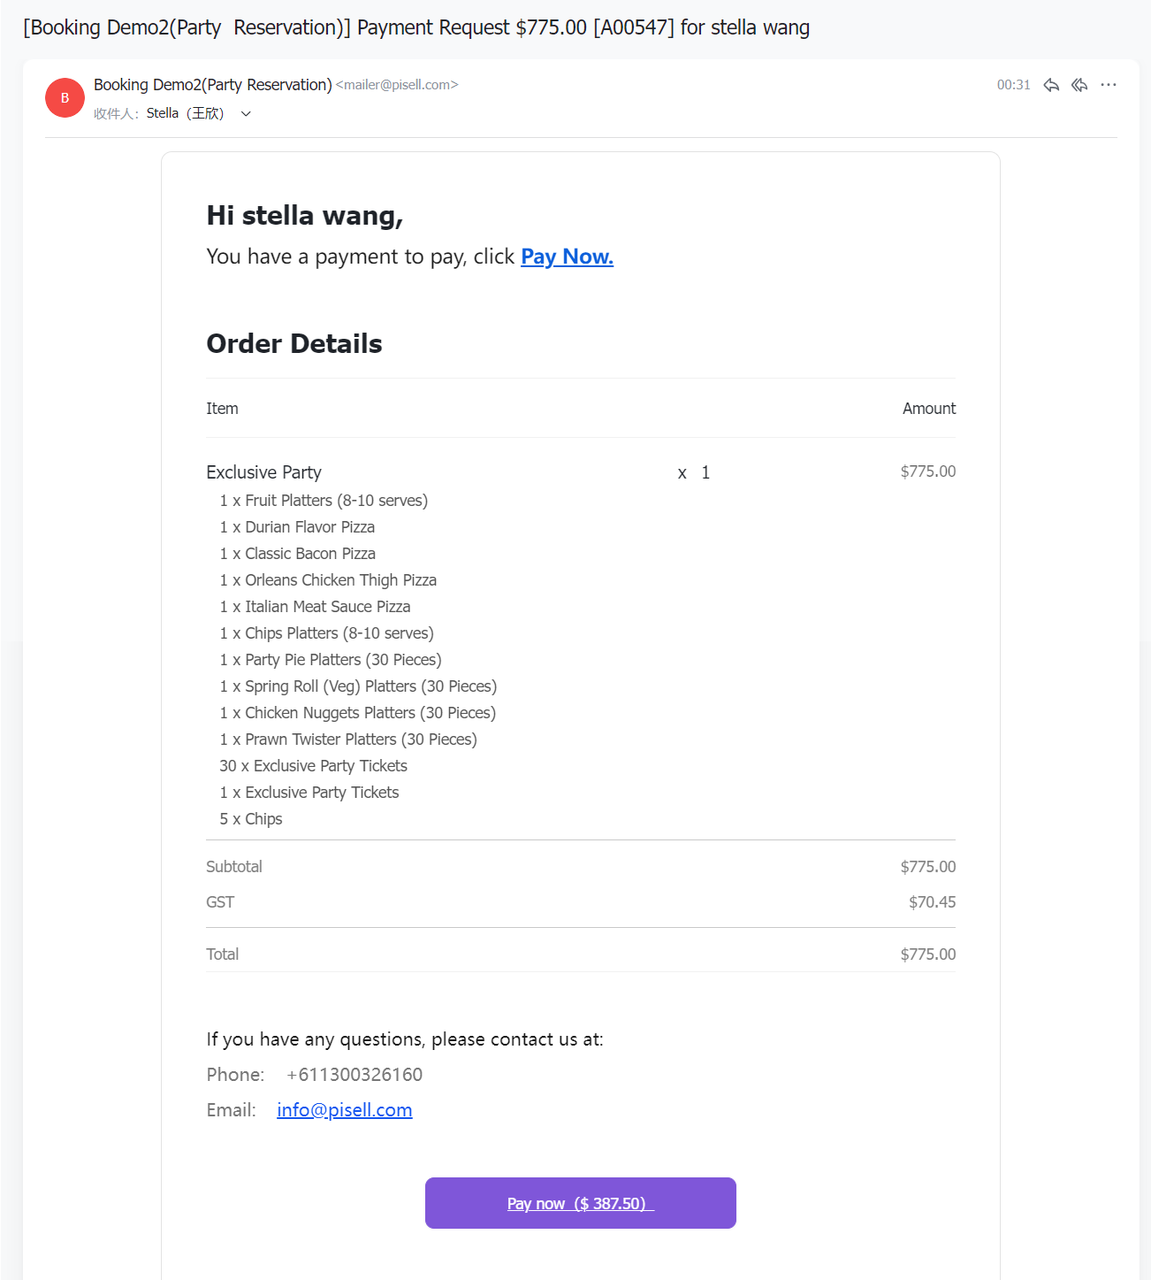
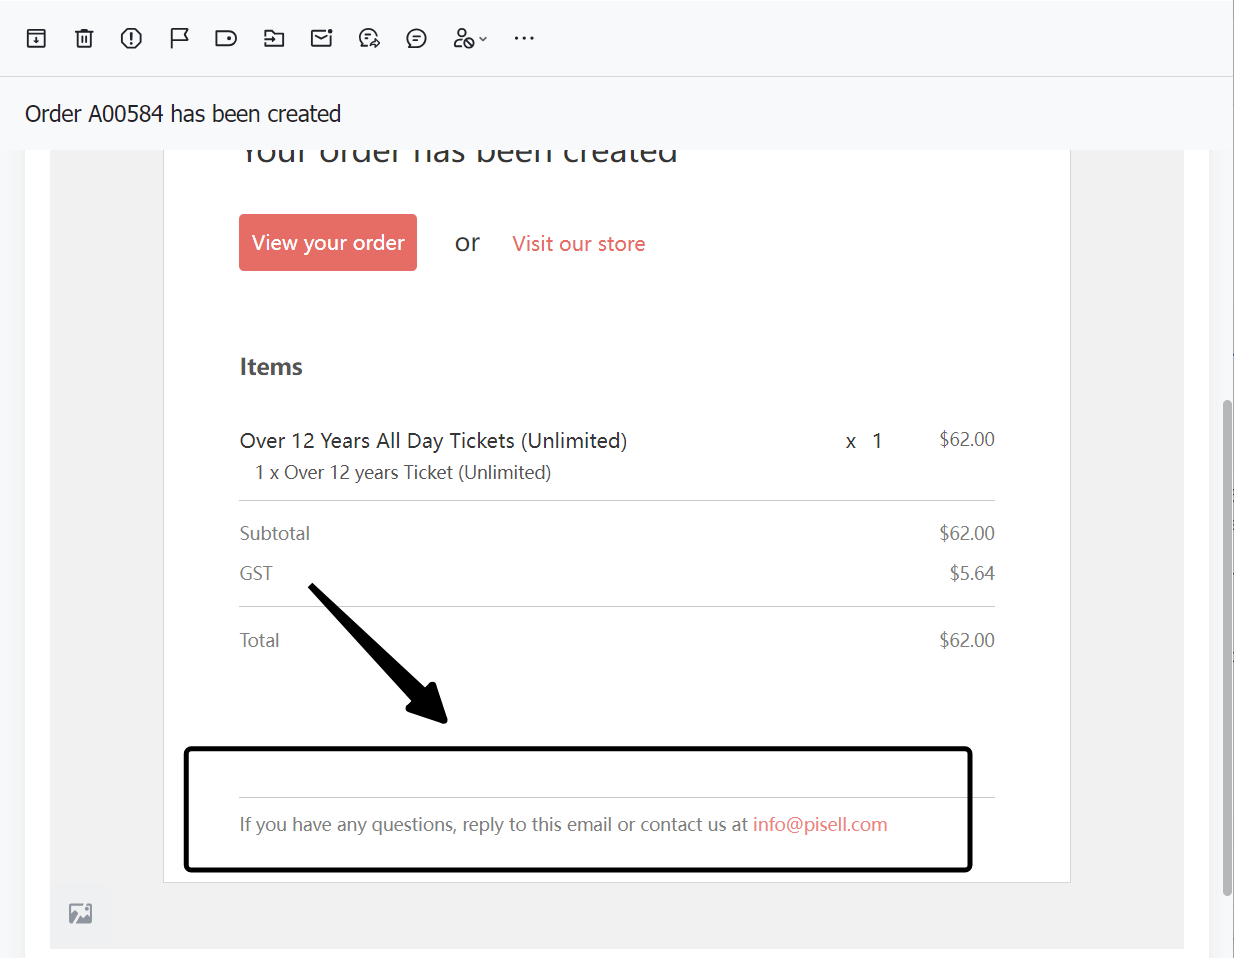
- Receive the Email
The customer checks their registered email address and locates the balance payment email from the merchant.
- Click the Payment Link
Click the balance payment link in the email. The system will redirect to the payment interface, where you can verify that the corresponding order's deposit and balance information is correct.
-
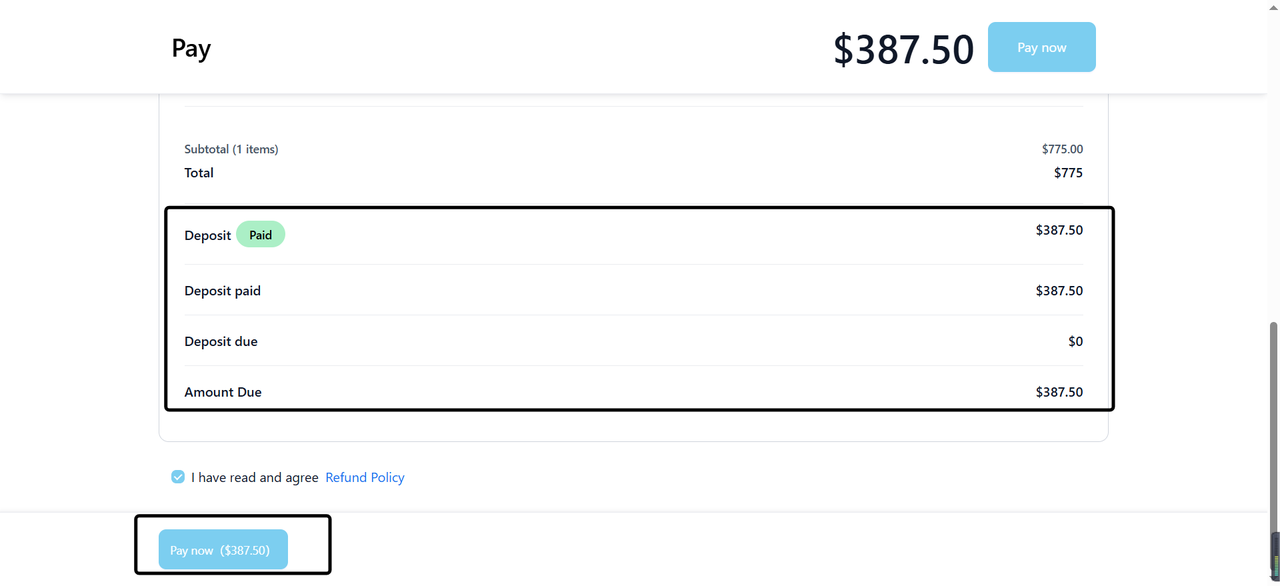
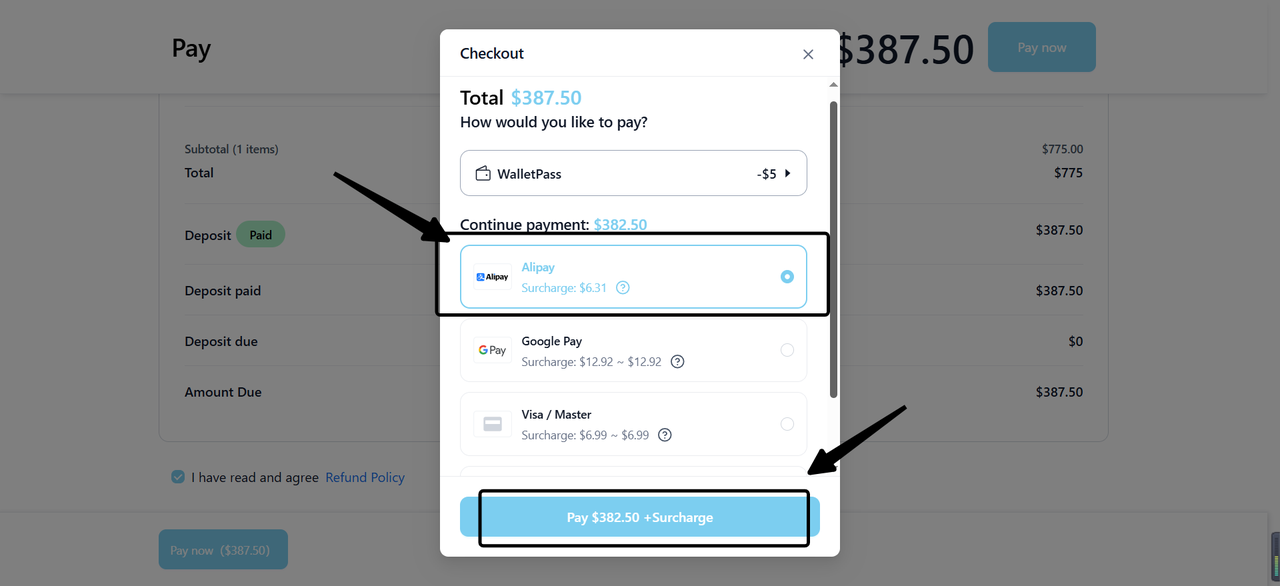
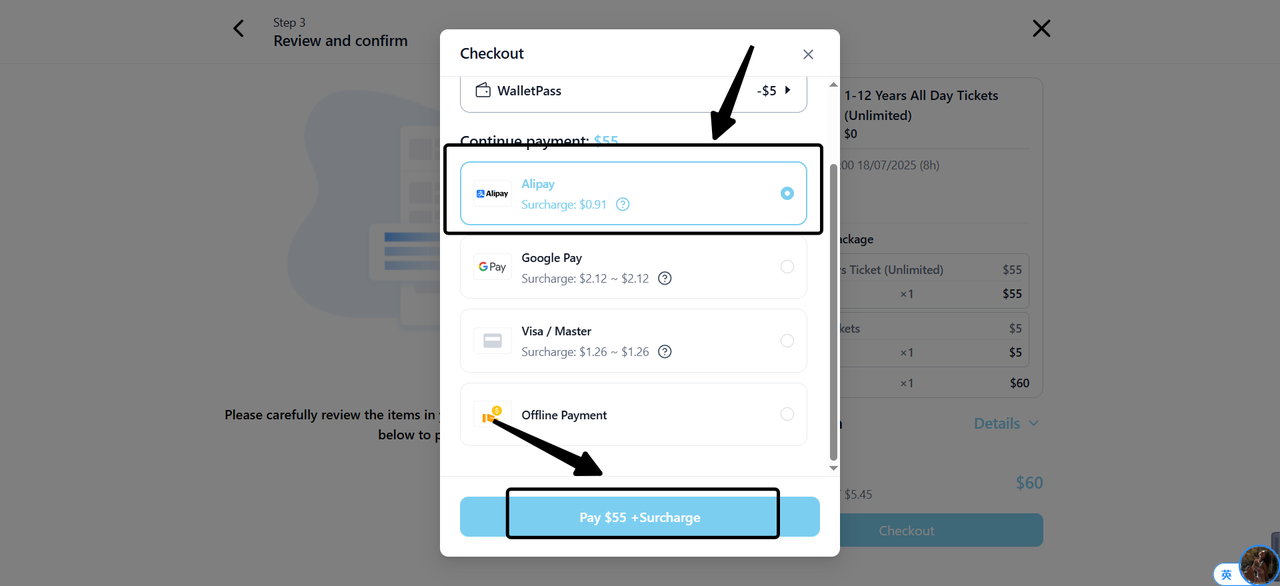
- Select Payment Method
After verifying that all information is correct, select "Pay Now" to proceed to the payment interface, then choose a suitable payment method (common options include credit card, Alipay, etc.).
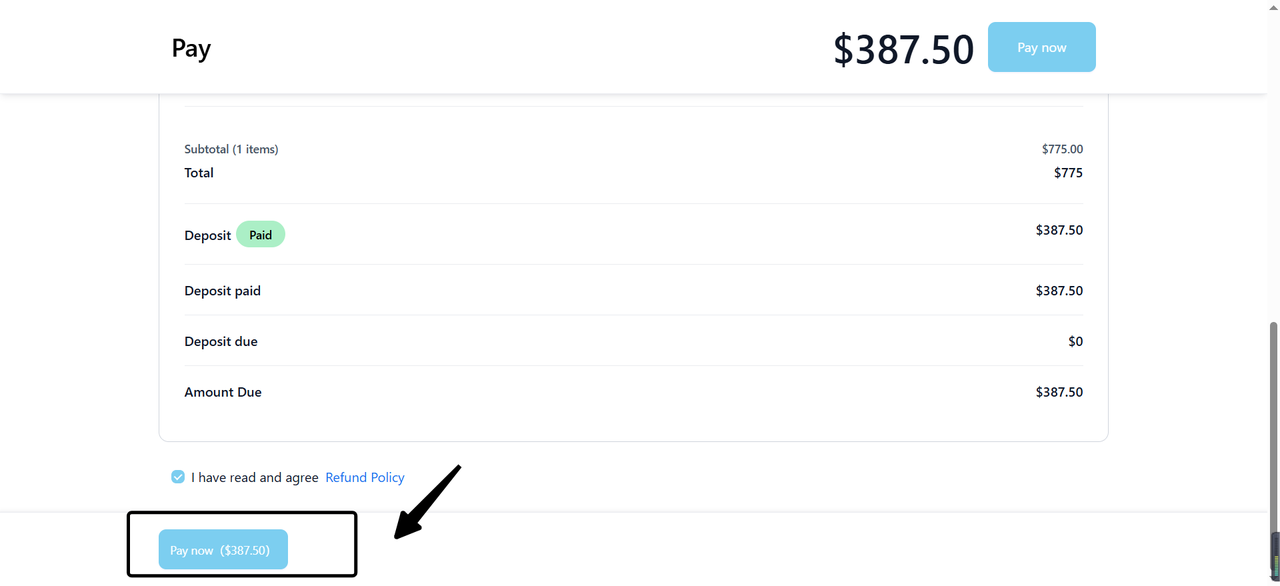
- Complete Balance Payment
Enter the relevant payment details as prompted by the system, then submit the payment after confirming everything is correct.
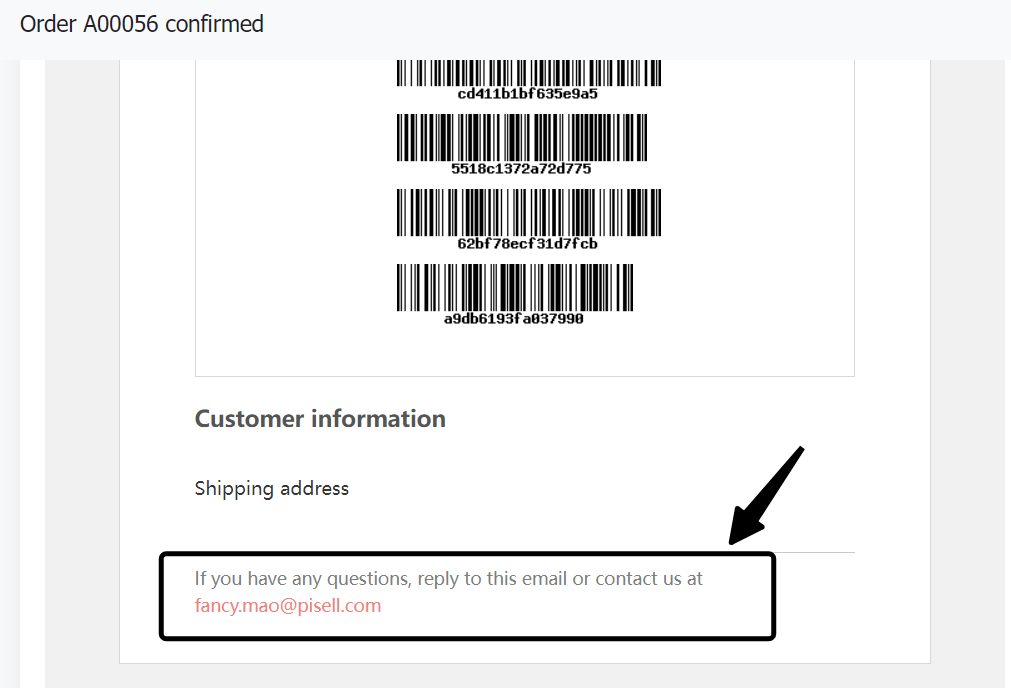
4. How to Modify or Cancel Party Information?
The client-side does not support guests directly modifying or canceling party orders. Customers may contact the merchant using the contact information provided in the order confirmation email to cancel or modify the order.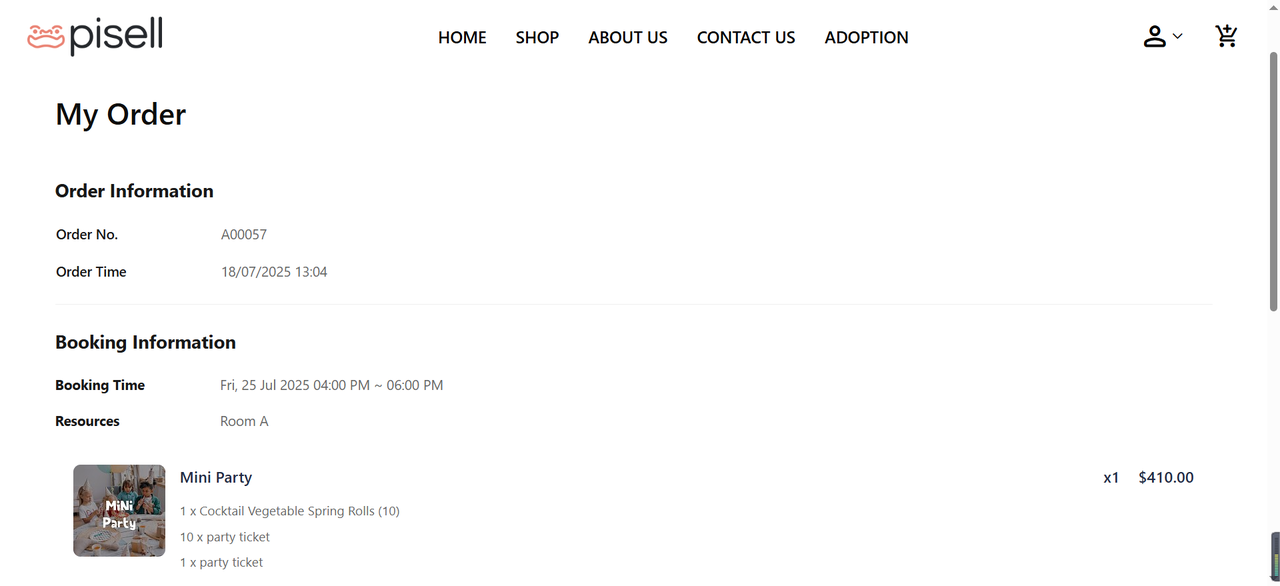
5. How to View Deposit-Related Notifications?
- Customer Online Booking: The customer completes the online booking of the party on the official website.
- Automatic Deposit Email Trigger: The system automatically generates or the merchant manually sends an email containing deposit payment information to the customer's email address.
- Customer Email Check: The customer logs in to their email account and locates the email from the system.
- Email Content Review:The email will include detailed order information such as the order number, party date, time, etc.Specific deposit amount and payment link.
Online Ticketing Guide
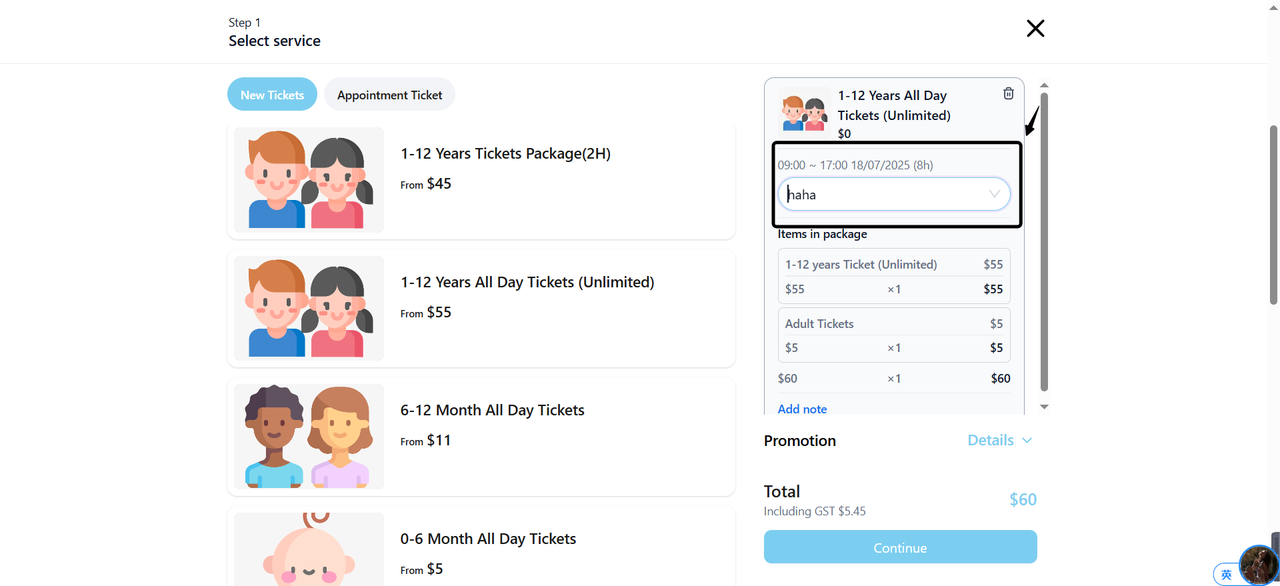
- Select Ticket Type: Based on their needs and preferences, customers browse the available Ticket types and click on the options that interest them.

- Select Package Details: On the details page of the selected Ticket, choose the desired booking date, time slot, number of tickets included in the package, and food options.
- Confirm Selection
After confirming that all selections are correct, click the "Add to Cart" button.

- Access "My Orders":On the Personal Center page, select the "My Orders" option.
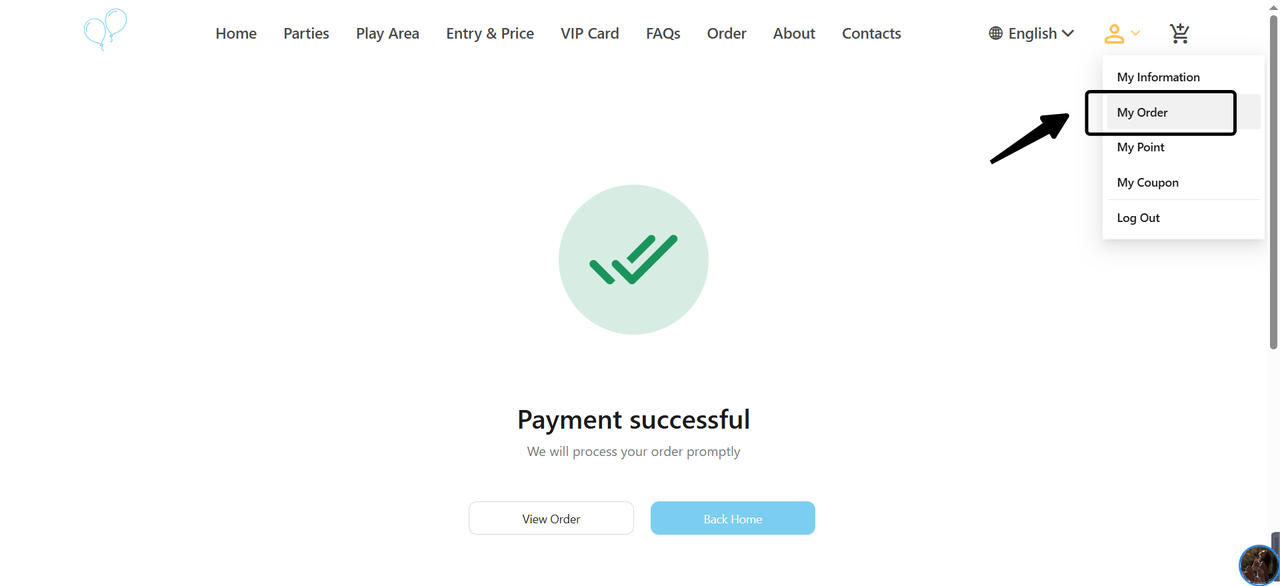
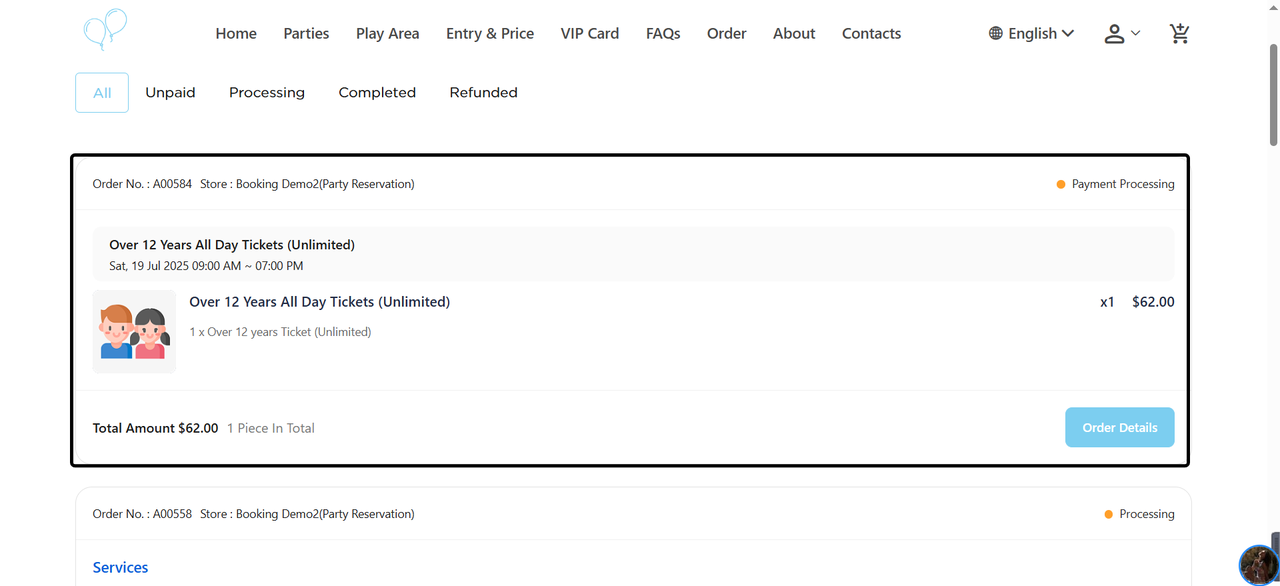
- View Order List:On the "My Orders" page, you will see information for all previously booked orders.

-
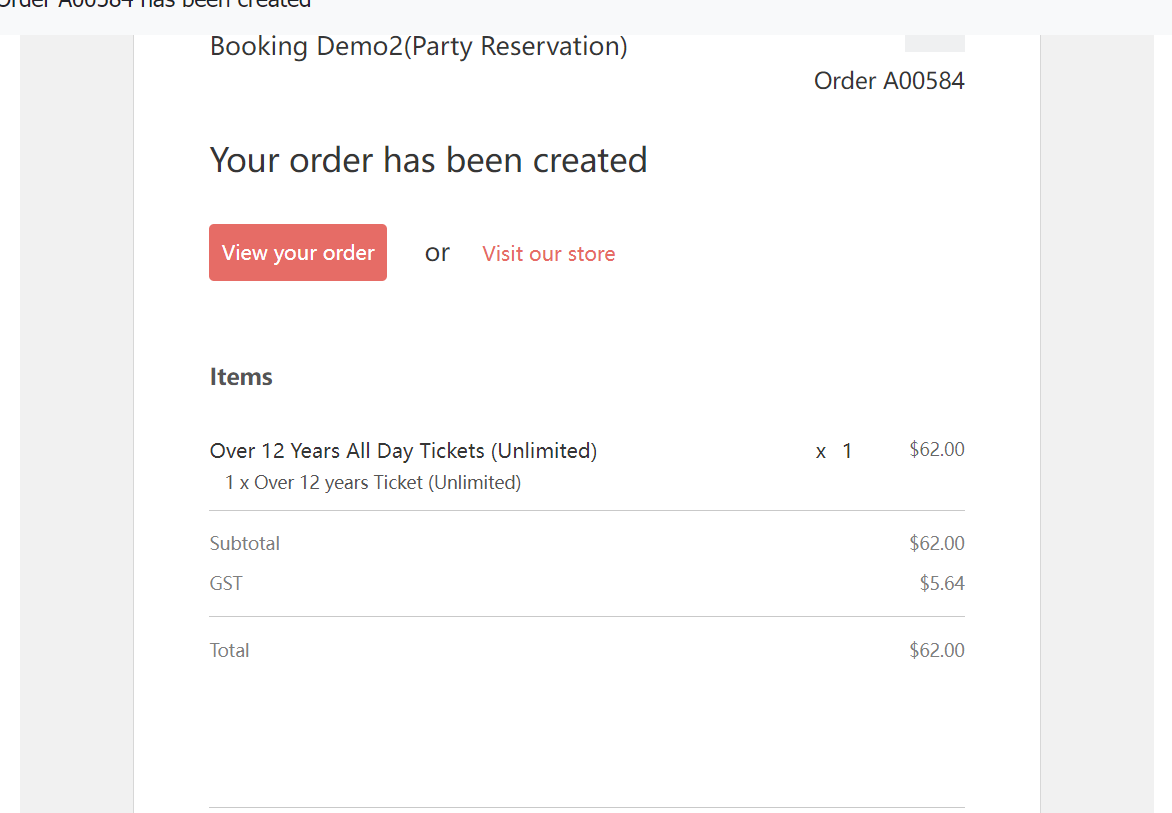
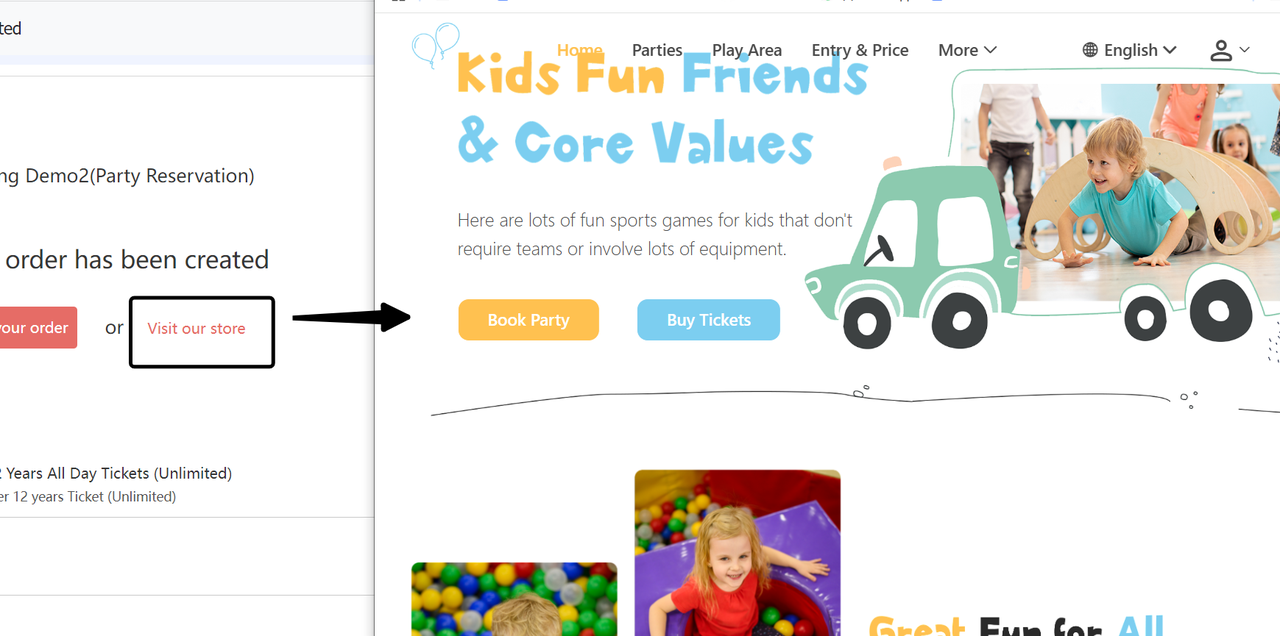
Access Order or Store:
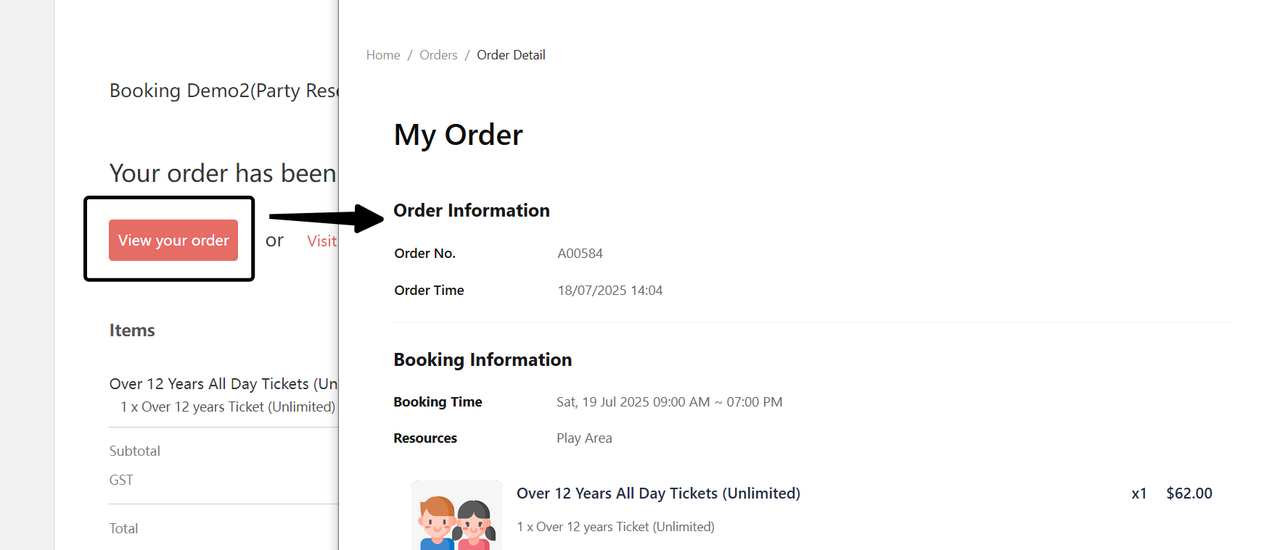
- Typically, the email will include buttons labeled "View Your Order" or "Visit Our Store". Clicking either button will take you directly to the order viewing page or the merchant's store.
View Your Order:
- Visit Our Store: View the corresponding order details according to the steps in section 1.2.1
2. Order Management
2.1 How Can Guests Cancel an Order? (Contact the Merchant for Assistance)
The client-side does not support guests directly canceling ticket orders. Customers may contact the merchant via the order confirmation email or the contact information on the official website to cancel or modify the order.
3. Using Wavior for Ticket Purchase
3.1 How Can Guests Use Wavior When Purchasing Tickets Online?
-
Add Ticket Items:
Customers select the desired ticket items and add them to the shopping cart.
-
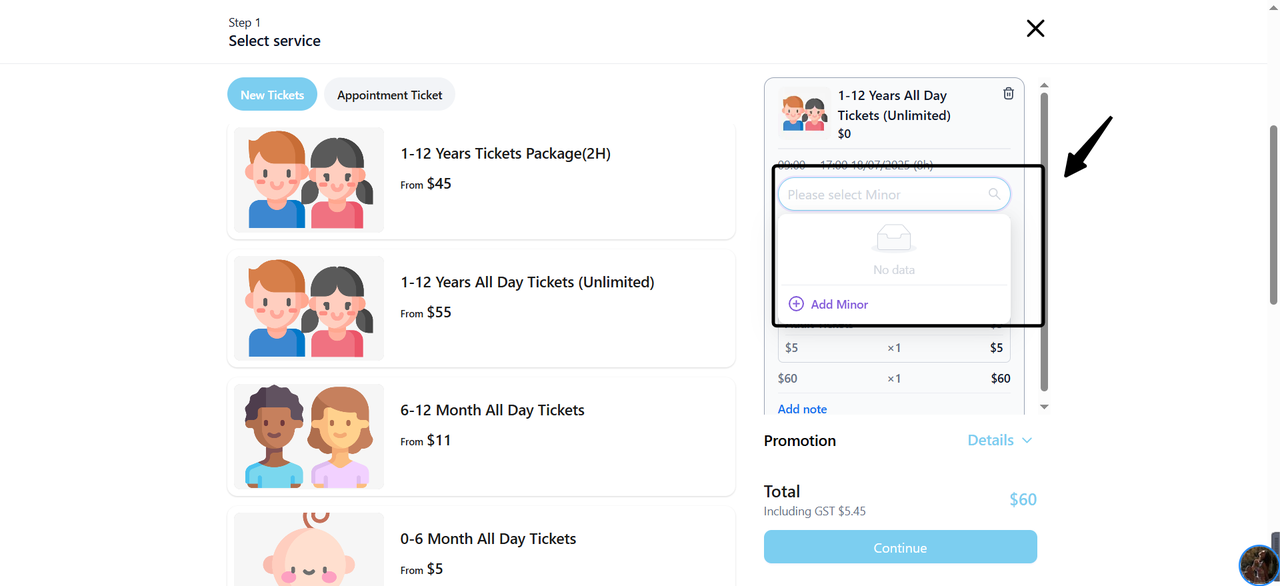
Link "Minor":
- On the shopping cart page, customers will see the option "Add New Minor".
- After clicking this option, the system will guide the customer to fill in information related to "Minor", the specific content of which depends on the merchant's requirements (such as name, age, contact information, etc.).
-
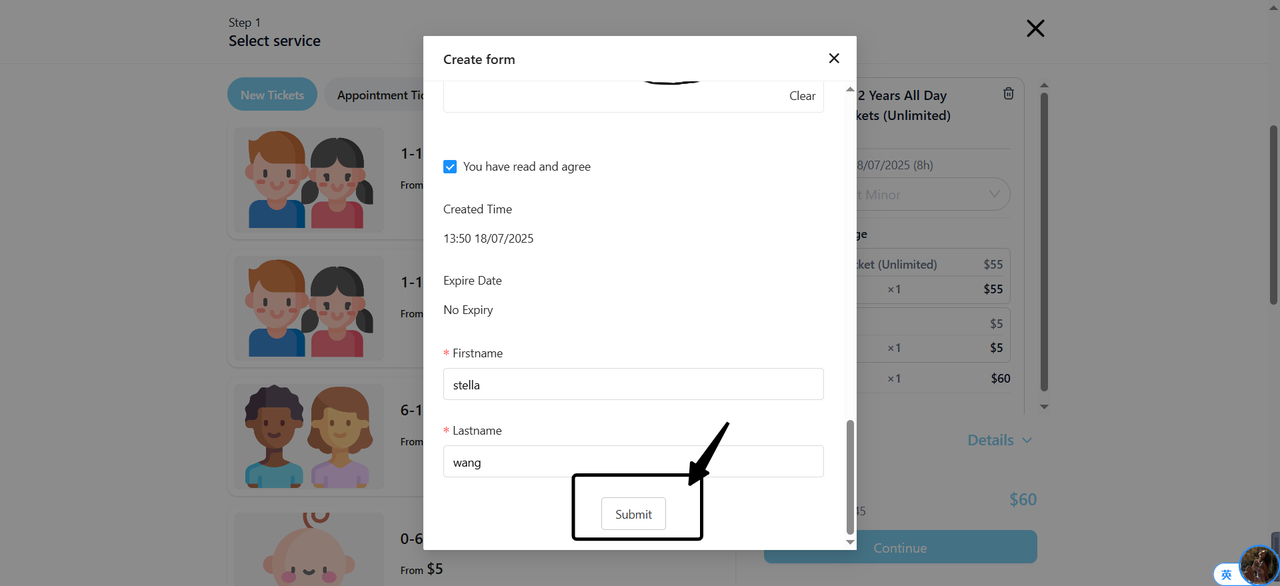
Fill in Information:
- Customers fill in the required information item by item according to the prompts, ensuring all information is accurate.
- After completing the filling, click the "Confirm Add" button.
-
Confirm Association:
- The system will automatically associate the newly created "minor" with the corresponding ticket.
- Customers can view the associated "minor" information in the shopping cart to ensure accuracy.
-
Proceed to Payment:
- After confirming the information is correct, customers click the "Continue" button to enter the payment page.
- Customers follow the system prompts to select an appropriate payment method and complete the payment process.

- Confirm Selection
- Select Package Details: On the details page of the selected Ticket, choose the desired booking date, time slot, number of tickets included in the package, and food options.
- Click "Checkout"
- Fill in Minor Information (if applicable)
-
9Family-Friendly Restaurant User Guide (Operational Items) - Client-Side Booking for Parties and Tickets
 22
22Family-Friendly Restaurant User Guide - Terminal for Booking Parties
![[Important Notice] Pisell Client Operations Team— Fixed Online Service Hours Pisell Support](https://file.mypisell.com/pisel/image/435/d7d250eb99c80ca34e3e7fc75c5b92cd2025_09_26_18_07_00_009_03613999964__2880_2112__.jpeg?x-oss-process=image/format,jpg/interlace,1,image/resize,w_1080/quality,Q_90/sharpen,90 "[Important Notice] Pisell Client Operations Team— Fixed Online Service Hours Pisell Support") 1061
1061[Important Notice] Pisell Client Operations Team— Fixed Online Service Hours Pisell Support
") 1402
1402Guidelines for Estimating Reserve (Merchant Self-Assessment Version)
 1327
1327Voluntary Withholding Funds & Reserve Explanation
 1249
1249Voluntary Withholding Funds
 1419
1419Online Payment 3DS Security Upgrade
 1712
1712Kids Playground Owners Beware: Your Payment System Might Be Charging You 3x More Than You Think
 3441
3441Manage Your Pisell Subscription
 3511
3511Pisell Payment Chargeback FAQ
 4036
4036Pisell Terminal Connecting to Cash Box
 3876
3876最好用的澳洲会员系统! - Pisell
 4100
4100Pisell Terminal Connected to Zebra DS2278 Barcode Scanner
 4469
4469Australian POS System vs. Traditional POS System: Which is Better?
 4530
4530